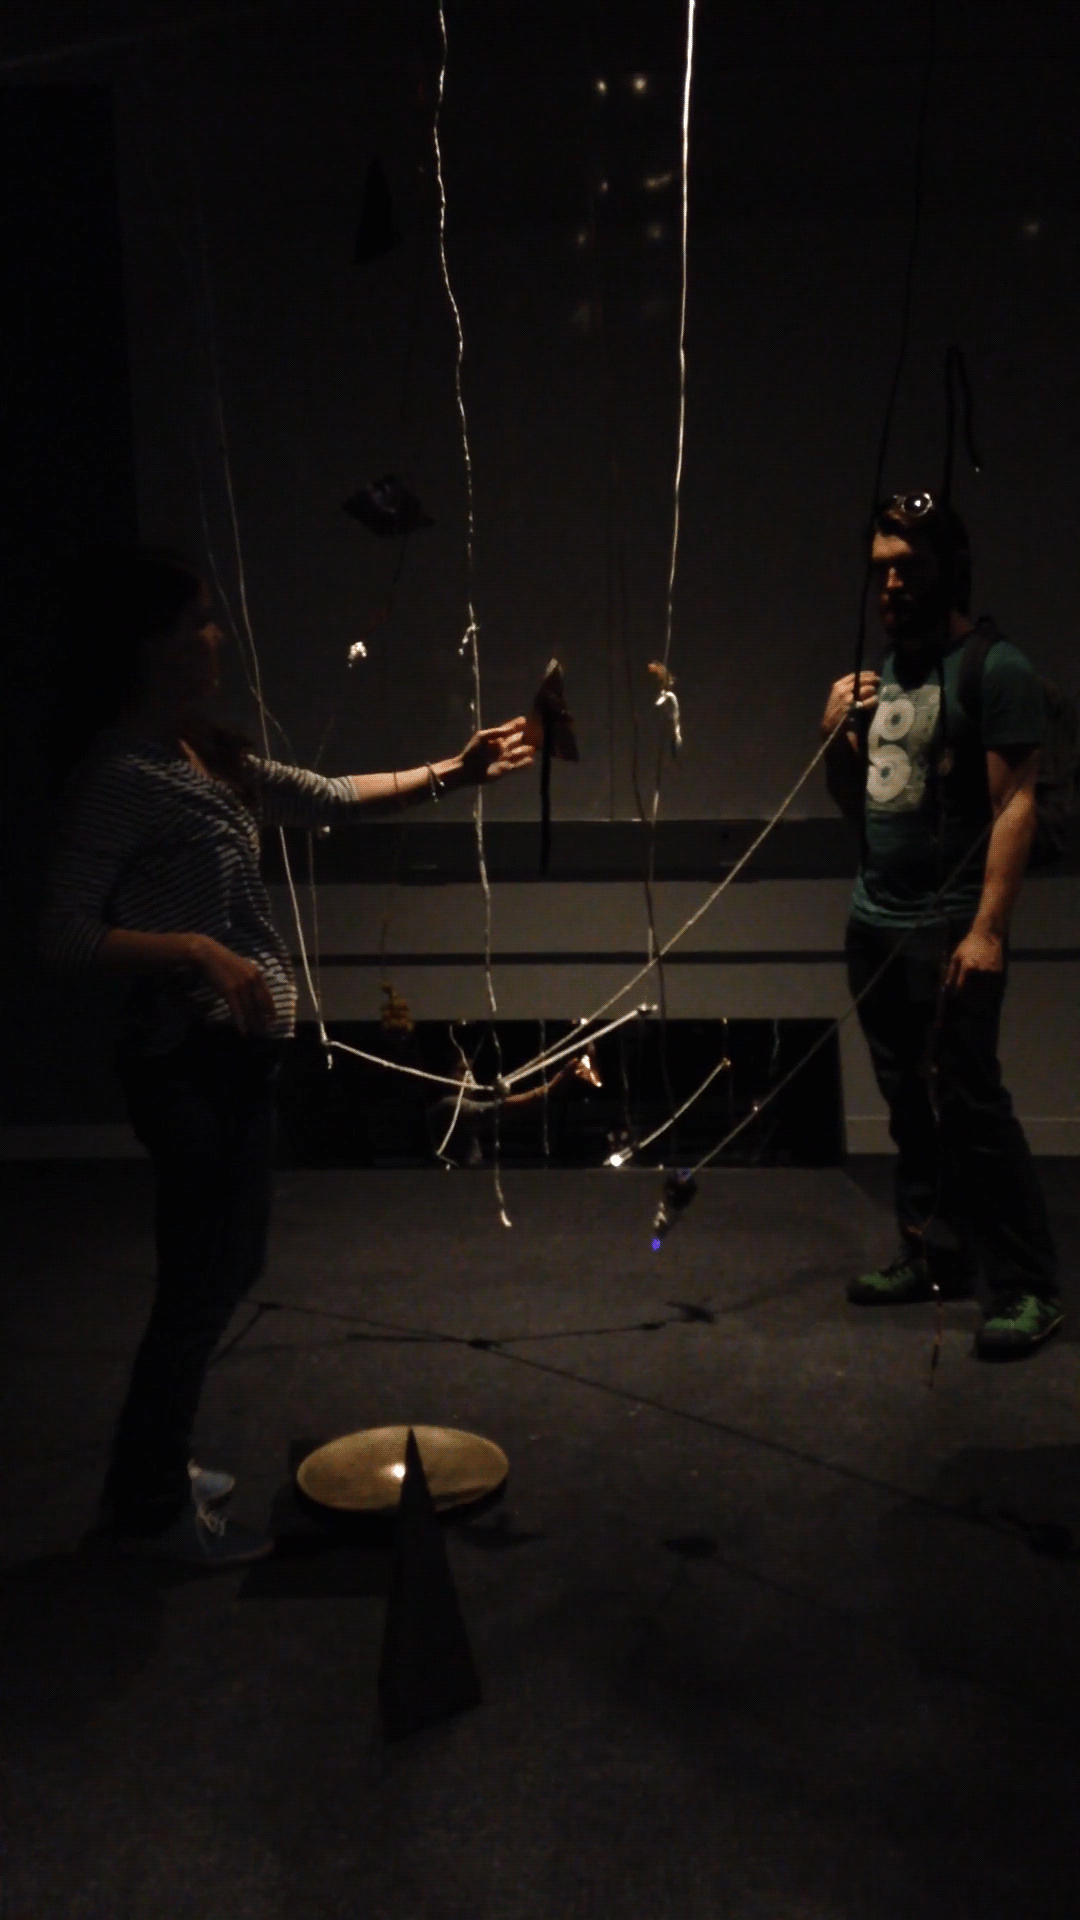
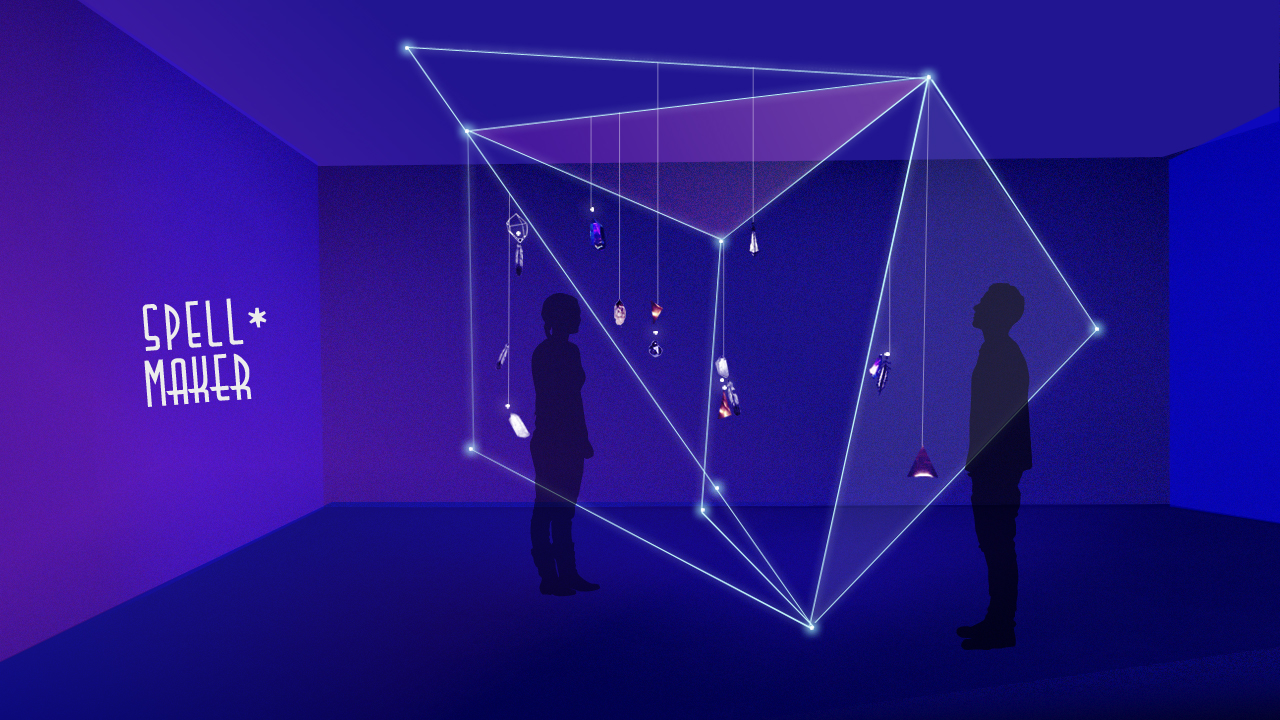
Spell Maker is an analog interactive light and sound environment, created from a holistic network of hanging cotton rope, copper foil, fabric, yarn, mirrors, pompons, LED lights, and wires.
It is an electric atmosphere of light and sound that runs on a system of analogue circuits, which are activated when intercepted by the human body’s natural electric field. Conceptually, the installation is a modular piece that does not rely on a principal hub such as a computer. Instead it uses capacitive sensing combined with the human body as input.
Dumbo Arts Festival, Brooklyn, 2014
.........................................................................................................................................................................
THE PROCESS! :)
1. Ideation. The first thing I did with this piece was to write down a word list of all the emotions and ideas I wanted people to feel:

2. Mood Board. Created a mood board that matched the words I had on my head.

3. Research. Made a research on concepts related to my idea: a soft circuit light installation / musical instrument; for example stars patterns, constellations, music of the spheres, harmony, microtonal music, deep listening, astrology. The content until this point was:
- Constellations (Astronomy)
- Zodiac Signs (Astrology)
- Musical Harmony
- Sonic Awareness & Meditation
- Consciousness
- Electronic Musical instrument
- Soft Circuits
- Light Installation
- LEDs
The questions that emerged were:
- Is there any relationship astronomical phenomena and events in the human world?
- Can people find a particular music note that makes them feel better?
- Do microtonal music has an influence in people’s state of mind?
- Is harmony something we should be aware of as humans to be able to connect with each other in a more sensible way?
- Can Microtonal music affect the inner human's mind states?
- Can an interactive art installation make people be able to think about their existence?
- Can art make people understand music in a different way, changing the role of audience to performer?
4. Context. From my ideation process, I created a context around the piece:
Magic. Unknown. Ritual. Spiritual growth. Sound medicine. Magical thinking. Meditation. Mystical forces.
5. Space Proposal. After the research and ideation. I generated space proposals to have a better sense of the installation I wanted to create.


6. Protoype 001. Basic Light Circuit. The first thing I needed to do was to plan the electronic part of the piece. For this prototype I used a PIR motion sensor, an arduino UNO, led lights and conductive thread.


7. Prototype 002. Capacitive Sensing Circuit. For this prototype I started doing a diagram to calculate the use of capacitive sensors. Technology that works better with my idea of using the human body electric field as a part of the installation. I am moving now to try and test different conductive materials as capacitors.

8. Prototype 003. Conductive Thread and capacitive sensing. Adding complexity to the circuit.
https://interactive-me.tumblr.com/post/84490390299/multiple-led-lights-and-conductive-thread-ready-i
9. Prototype 004. The structure. Triangle Modules. First drawings, then mini paper prototype, then small wood size.


10. Model 001 Construction. The idea of a mobile comes from the circuit. Wires need to be connected in the same circuit board. I made this bigger prototype to test the circuit with the lights attached to it.


11. Test 001. This first test was made two weeks before the final exhibition, I tested how people interacted with the piece and what the new and final measures should be. The monster is expanding!

12. Test 002. For this version. I changed the triangular structure to the grid on the exhibition area. This grid is a square grid structure hanging from the ceiling. I had great feedback and reactions from people, which I used to make the final model.

13. Final Model Construction. After the first tests, I designed the final piece for Dumbo Arts Fest. I knew I was going to use a space of 7x7x7 ft.
13.1 We created real size renders to have an idea of the proportions.
In the next images you can see the floor plans for the construction of the ceiling we used at the exhibition.


13.2 The triangles changed from wood to fabric pieces. The first step was to cut the fabric on pieces.

13.3 The circuits were embroidered in the fabric triangles with conductive thread. Two circuits used lilypad boards and one used a teensy microcontroller.


13.4 After embroidering the microcontrollers, resitors, led's and buzzers. The already coded program in Arduino C to activate the system was updated for each particular condition. The circuits had different triggers and light distribution.

13.5 Each circuit had ribbons with conductive thread and other materials that conducted the electricity. We embroidered around 40 ribbons.

14. Dumbo Arts Fest The final piece (the one you can see in the video above), was premiered and tested in the 2014 edition of the festival. It was up for three days, receiving hundreds of people. It was very interesting to see how people reacted and interacted with the piece, from rubbing their faces into the pompons and smelling the ribbons to try to toaching the mirrors.


The interaction in general was very soft and delicate, people felt the lightness of the materials and touched the components carefully. A lof of things were learned in this process, particularly on how to make feedback more obvious, as brighter light and louder sounds. Perhaps the use of a closed space (as a box or small room) would have helped the subtle feedback to be more obvious.


Pana Li works at the intersection of color, sound, design and technology. As a designer, she helps tech products create delightful experiences from scratch. When she is not designing you can catch her dj sets via Radio Nopal, or playing in Duolingo.
When